We use cookies to improve your experience. By visiting this website, you agree to our Privacy Policy and Terms & Conditions.
1
or
1
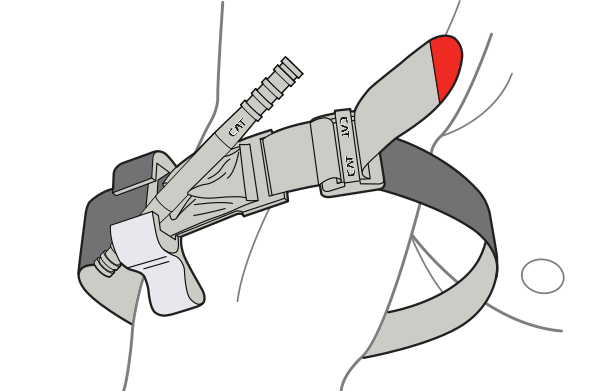
One-Handed Application
Insert the injured limb through the loop in the band and position the C-A-T® 2-3" above the bleeding site directly to the skin.*
Two-Handed Application
Route the band around the limb, pass the res tip through the slit of the buckle, and position the C-A-T® 2-3" above the bleeding site directly to the skin.*
2
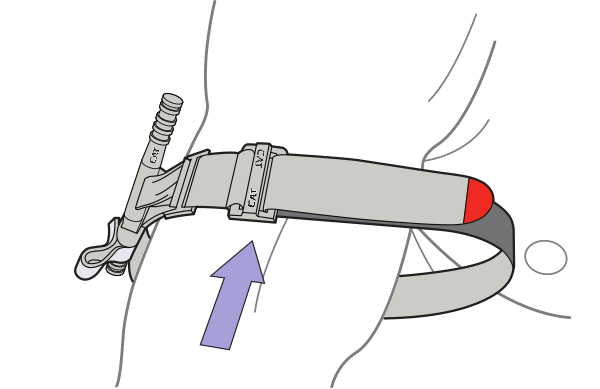
Pull band tightly and fasten it back on itself all the way around the limb, but not over the rod clips. Band should be tight enough that tips of three (3) fingers cannot be slid between the band and the limb. If the tips of three (3) fingers slide under band, retighten and re-secure.
3
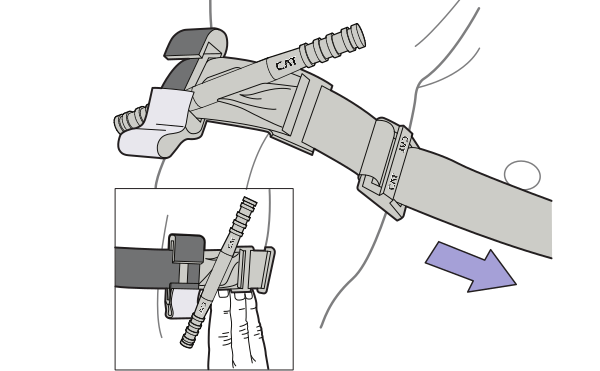
Twist the rod until bleeding has stopped.
4
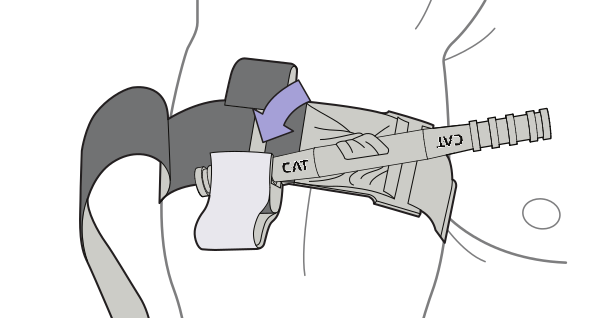
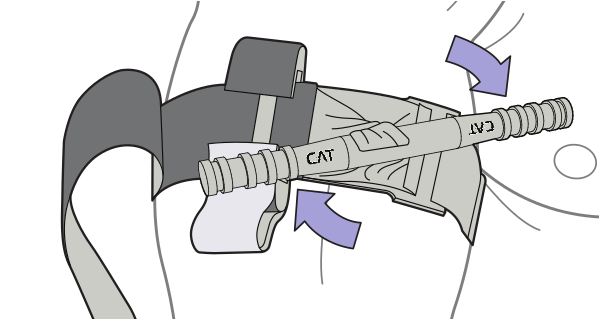
Secure the rod inside a clip to lock it in place. Check for bleeding and distal pulse. If bleeding is not controlled, or distal pulse is present, consider additional tightening or applying a second C-A-T® above and side-by-side to the first. Reassess.
5
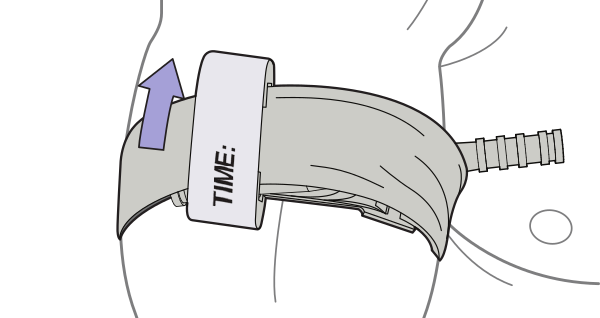
Route the band between the clips and over the rod. Secure rod and band with TIME strap. Record time of application.
*If you cannot be sure or cannot take the additional time to examine where the bleeding is coming from based on the situation, the C-A-T® can be effectively applied over clothing as high on the arm or leg as possible. The C-A-T® must NOT be applied over solid objects within the clothing. As soon as the situation permits, the injured limb should be evaluated and the C-A-T® re-positioned 2"-3" above the injury directly to the skin.